Immich is one of the easiest ways to turn a plain Linux box into a photo and video server that actually feels modern. If you want automatic mobile uploads, albums, search, facial recognition, and a cleaner replacement for scattering memories across random cloud accounts, it is a very strong self-hosting option.
In this guide, you will install Immich on a Linux server with Docker Compose, use the project’s current release files, choose safer storage locations, start the containers, and complete the first browser-based setup.
Why Immich is worth hosting yourself
Immich is built for personal photo and video management.
That makes it appealing for self-hosters because it gives you:
a private library under your control
mobile backup support
web access for browsing and sharing
machine-learning features for better search and organization
a cleaner long-term home for family photos than a pile of unsorted folders
It is also one of the stronger flagship topics for a self-hosting site because the use case is immediately understandable even for beginners.
What you need before you start
Before you begin, make sure you have:
a 64-bit Linux server or VPS
Docker Engine installed from Docker’s official repository
the Docker Compose plugin available as
docker composeat least 6 GB of RAM, with 8 GB recommended by Immich for a smoother experience
enough disk space for your library, generated thumbnails, and transcoded video
If Docker is not installed yet, do that first:
Immich’s requirements docs also recommend local Linux storage for the database and warn that non-Linux setups often create a worse Docker experience.
Two important storage warnings before you deploy
These are easy to skip and annoying to fix later.
Keep the database on local storage
Immich’s requirements docs say the Postgres data directory should ideally live on local SSD-backed storage and never on a network share.
That matters because database latency and filesystem behavior are a big part of whether Immich feels stable.
Plan for extra storage beyond the original photos
Immich notes that thumbnails and transcoded video can increase storage usage by roughly 10 to 20 percent on average.
So if you already have a large library, do not size the server as if it only needs the exact space used by your original uploads.
What Immich installs with Docker Compose
The current Compose stack includes several services working together:
immich-serverfor the main web app and APIimmich-machine-learningfor AI-assisted featuresredisfor caching and queue workdatabasefor PostgreSQL storage
This is one reason Immich is much nicer to deploy from the official Compose files than from a hand-written stack on day one.
Step 1: Create a folder for the Immich stack
Create a dedicated directory for the project.
mkdir -p ~/immich-app
Move into it.
cd ~/immich-app
Step 2: Download the current Immich Compose file
Immich’s own install docs say to use the files from the current release rather than copying a random compose file from somewhere else.
Download docker-compose.yml.
wget -O docker-compose.yml https://github.com/immich-app/immich/releases/latest/download/docker-compose.yml
Step 3: Download the example environment file as .env
wget -O .env https://github.com/immich-app/immich/releases/latest/download/example.env
At this point, your folder should contain the two files Immich expects.
Step 4: Review the settings you actually need to change
Open .env in your editor.
nano .env
The most important values to review are:
UPLOAD_LOCATION— where Immich stores uploaded mediaDB_DATA_LOCATION— where PostgreSQL stores its database filesTZ— your server timezoneDB_PASSWORD— the local database password used by the stackIMMICH_VERSION— normally safe to leave as provided by the current release file unless you are intentionally pinning versions
A good beginner-friendly example looks like this:
UPLOAD_LOCATION=./library
DB_DATA_LOCATION=./postgres
TZ=Etc/UTC
IMMICH_VERSION=<leave the downloaded default unless you are pinning a version>
DB_PASSWORD=replacewithyourownrandomstring
DB_USERNAME=postgres
DB_DATABASE_NAME=immich
A few practical notes matter here:
UPLOAD_LOCATIONshould point to storage with enough room for your actual photo libraryDB_DATA_LOCATIONshould stay on local Linux-compatible storageDB_PASSWORDshould not stay at the placeholder valueImmich recommends using only
A-Za-z0-9characters forDB_PASSWORD
If you want a quick random password made of only letters and numbers, generate one like this:
python3 -c "import secrets,string; a=string.ascii_letters+string.digits; print(''.join(secrets.choice(a) for _ in range(24)))"
Copy the result into the DB_PASSWORD= line in .env, save the file, and exit the editor.
Step 5: Double-check your storage plan
Before you start the stack, confirm that your two important paths make sense:
media storage can grow over time
database storage is local, not on a network share
the filesystem supports normal Linux ownership and permissions
This step sounds boring, but it is much easier than migrating a large photo library later.
Step 6: Start Immich in the background
From the ~/immich-app directory, start the containers.
docker compose up -d
Immich’s docs note that if you hit weird Compose or Docker version errors here, it usually points back to an outdated or distro-packaged Docker install rather than an Immich-specific problem.
Step 7: Check that the containers came up cleanly
docker compose ps
You should see the Immich services listed and moving toward a healthy running state.
If one of them exits immediately, inspect the logs before continuing.
docker compose logs --tail=100 immich-server
Step 8: Open the web interface
By default, the official Compose file publishes Immich on port 2283.
Open this in your browser, replacing YOUR_SERVER_IP with your real server address:
http://YOUR_SERVER_IP:2283
If you already use a reverse proxy stack, you can later put Immich behind a domain with HTTPS instead of leaving it on a raw port.

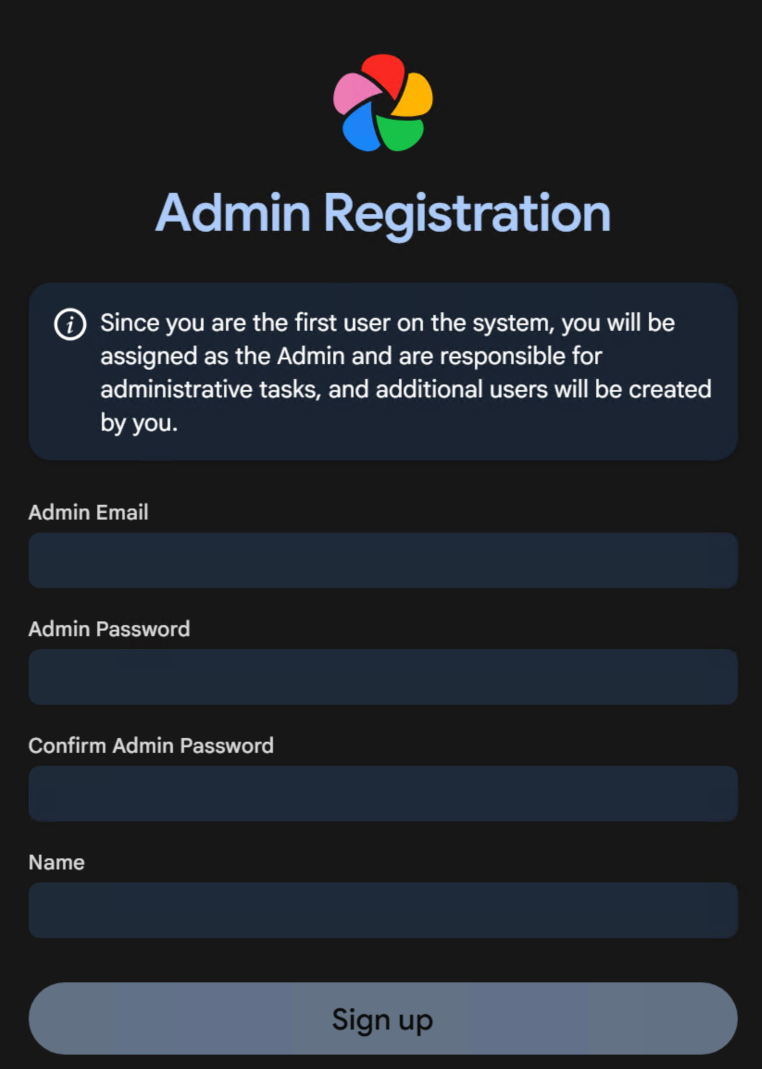
Step 9: Create the first admin account
Immich’s post-install flow starts by registering the admin user in the web interface.
Use a strong password and an email address you control, then finish the initial setup in the browser.
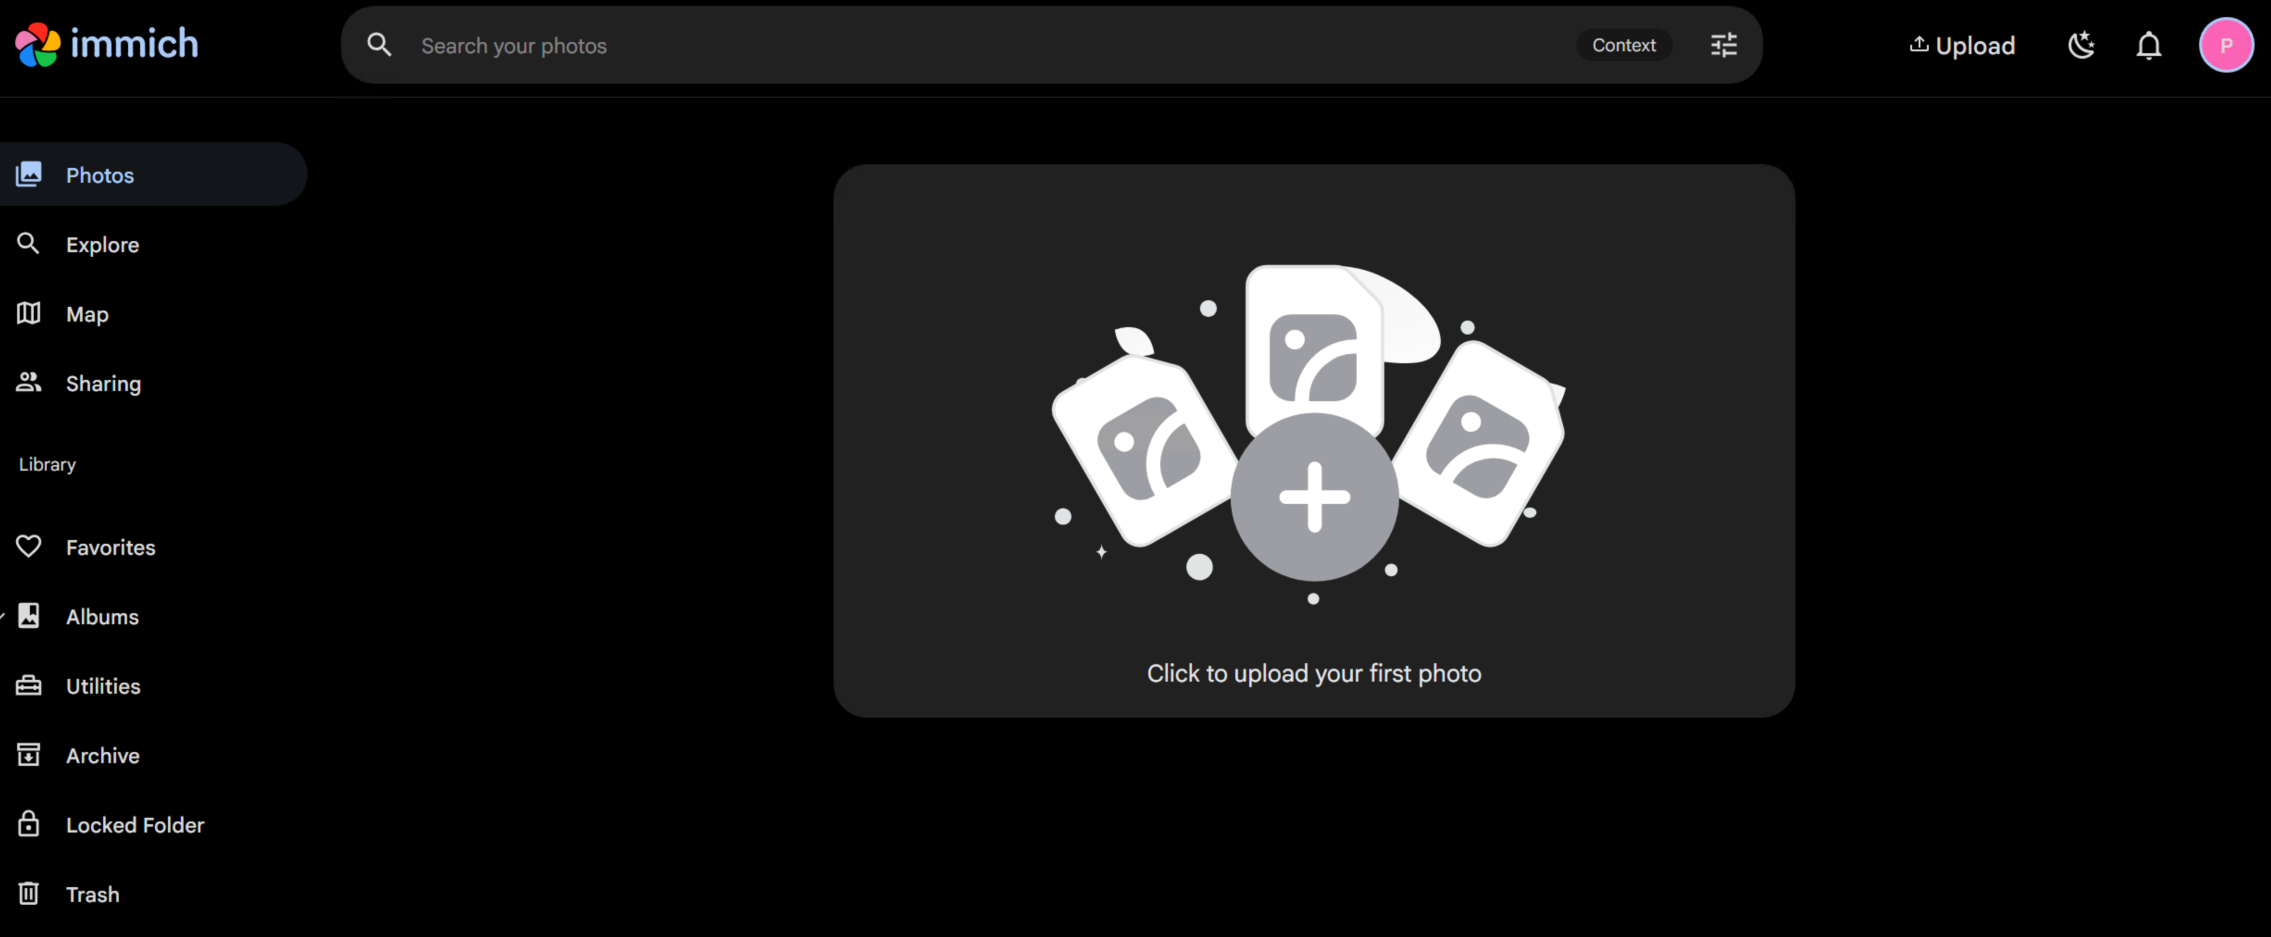
Once you are signed in, you can create additional users later if needed. Complete the initial setup wizard and you'll land on the Immich dashboard at the end.
What to do after the install
A working install is only the beginning. The most useful next steps are:
connect the mobile app and test photo backup
review storage templates and library organization
plan backups for both uploaded media and the database
decide whether you want a domain name and HTTPS in front of Immich
If you want cleaner public access later, pair this with one of your reverse proxy guides once it is published or use your preferred existing proxy stack.
Common beginner mistakes to avoid
Using the wrong Docker package
Immich’s docs explicitly warn that older distro-packaged Docker versions can cause confusing errors. If docker compose behaves oddly, fix Docker first instead of guessing.
Leaving the database on unsuitable storage
The database path is not a place for a network share or a random compatibility filesystem.
Assuming the server only needs space for original uploads
Thumbnails, previews, and transcoded video add overhead, so leave room to grow.
Final check
A healthy first install usually means:
docker compose psshows the stack runningthe web app opens on port
2283you can create the first admin account
the dashboard loads without container errors
At that point, Immich is ready for post-install tasks like mobile backup, domain setup, and backup planning.
Sources
Immich Docker Compose install docs: https://immich.app/docs/install/docker-compose/
Immich requirements docs: https://immich.app/docs/install/requirements/
Immich official release compose file: https://github.com/immich-app/immich/releases/latest/download/docker-compose.yml
Immich official release example env file: https://github.com/immich-app/immich/releases/latest/download/example.env