Uptime Kuma is a great first monitoring tool because it solves a very normal self-hosting problem: you want one place to see whether your apps are up before your friends, users, or future-you discover the outage the fun way. It is simple enough for a first deployment, but useful enough that many homelabs keep it around permanently.
In this guide, you will deploy Uptime Kuma with Docker Compose, keep its data persistent, open the web interface, create the first admin account, and add an initial monitor so the dashboard does something more exciting than existing.
Why self-host Uptime Kuma?
The official project describes Uptime Kuma as an easy-to-use self-hosted monitoring tool, which is refreshingly accurate for once.
It is useful because it gives you:
uptime checks for websites, ports, ping targets, DNS records, and more
notifications through services such as Telegram, Discord, Slack, email, and many others
status pages you can share publicly or internally
SSL certificate information and expiry visibility
a much friendlier interface than staring at a shell and guessing
For a beginner-friendly self-hosting site, it is also a strong early article because the value is obvious within a few minutes of setup.
Is a VPS a good fit for Uptime Kuma?
Usually, yes.
A small Linux VPS is enough for many starter setups if your main goal is to monitor a handful of apps, domains, or endpoints. Uptime Kuma is not a giant analytics platform. It is more like a watchful dashboard that checks whether your stuff is reachable and then tattles helpfully when it is not.
Docker Compose is also a good fit here because the official project publishes a minimal Compose example with one container, one persistent data path, and one port.
What you will need
Before you start, have these ready:
a Linux server or VPS
SSH access to that server
Docker already installed and working
the Docker Compose plugin available as
docker composeport
3001open locally on the server if you plan to access the app directlyabout 10 to 15 minutes
If Docker is not installed yet, do that first:
How to Install Docker on Ubuntu and Run Your First Container
Docker Compose for Self-Hosted Apps: A Beginner-Friendly Guide
Important: Uptime Kuma's docs warn that filesystems like NFS are not supported for its data path because SQLite needs proper file locking. Keep the app data on a local directory or Docker volume.
Before you start
All commands in this tutorial are run on your server over SSH.
If you are brand new to the flow, you will:
connect to the server
create an app folder
add the official Compose file
start the container
open port
3001in your browsercreate the first admin account inside Uptime Kuma
If you later want a cleaner URL and HTTPS, add a reverse proxy after the base install is working:
What the official Docker Compose setup includes
The current project README shows a very small Compose stack:
the
louislam/uptime-kuma:2imagea bind mount from
./datato/app/dataport
3001a restart policy so the container comes back after reboot or failure
That simplicity is part of the appeal. You do not need a separate database just to get started.
Step 1: Connect to your server
Use SSH from your local machine.
ssh your-user@your-server-ip
Replace your-user with your Linux username and your-server-ip with your server's public IP address.
If this is your first login to the server, SSH may ask whether you trust the host fingerprint. That is normal.
Step 2: Create a folder for Uptime Kuma
Create a dedicated app directory so the stack is easy to find later.
sudo mkdir -p /opt/uptime-kuma
Now give your normal user ownership of it.
sudo chown "$USER":"$USER" /opt/uptime-kuma
Move into the directory.
cd /opt/uptime-kuma
Step 3: Create the data folder
The official setup stores persistent app data under /app/data inside the container, so I will map that to a local folder named data.
mkdir -p data
Do not point this at NFS or another network share unless you enjoy debugging SQLite corruption warnings in your free time.
Step 4: Create the compose.yaml file
The official project provides a small Compose example. Save this as compose.yaml.
cat > compose.yaml <<'EOF'
services:
  uptime-kuma:
    image: louislam/uptime-kuma:2
    restart: unless-stopped
    volumes:
      - ./data:/app/data
    ports:
      - "3001:3001"
EOF
What the important lines do
image: louislam/uptime-kuma:2
This pulls the official Docker image for Uptime Kuma.
./data:/app/data
This keeps your database and app settings outside the container so they survive updates or container recreation.
3001:3001
The app listens on port 3001, which is the default web interface port shown in the project's docs.
restart: unless-stopped
This tells Docker to start the container again after a reboot unless you intentionally stopped it.
Step 5: Start Uptime Kuma
Launch the stack from /opt/uptime-kuma.
docker compose up -d
Docker will download the image the first time, so this step may take a minute or two on a fresh server.
Step 6: Check that the container is running
docker compose ps
You should see an uptime-kuma service in a running state.
If it exits immediately, check the logs.
docker compose logs --tail=100 uptime-kuma
Step 7: Open the web interface
Visit the server in your browser on port 3001.
http://YOUR_SERVER_IP:3001
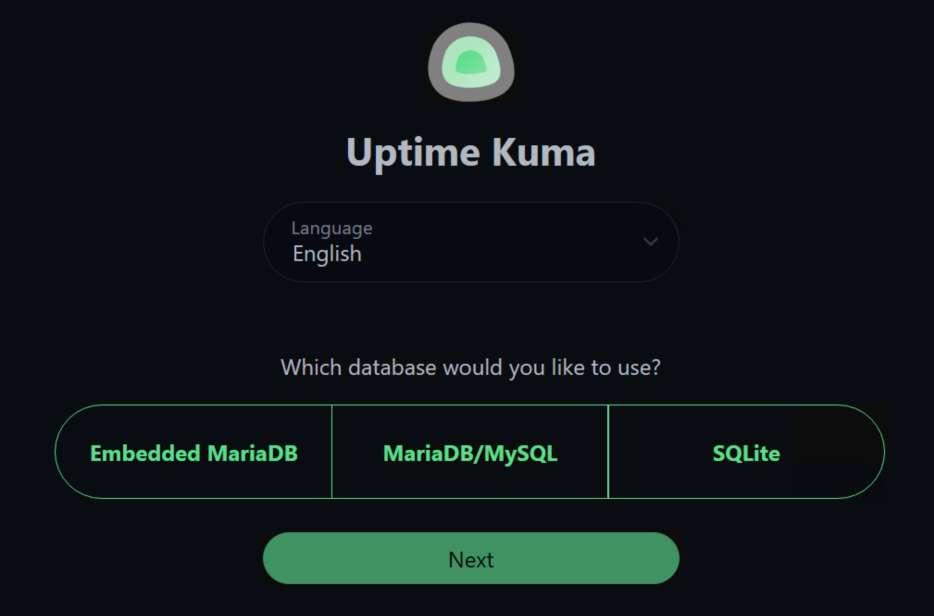
On first launch, Uptime Kuma should show the setup screen where you choose the DB type and create the initial admin account.
If the page does not load:
confirm the container is running
make sure no firewall is blocking port
3001verify that you used the server's real public IP address
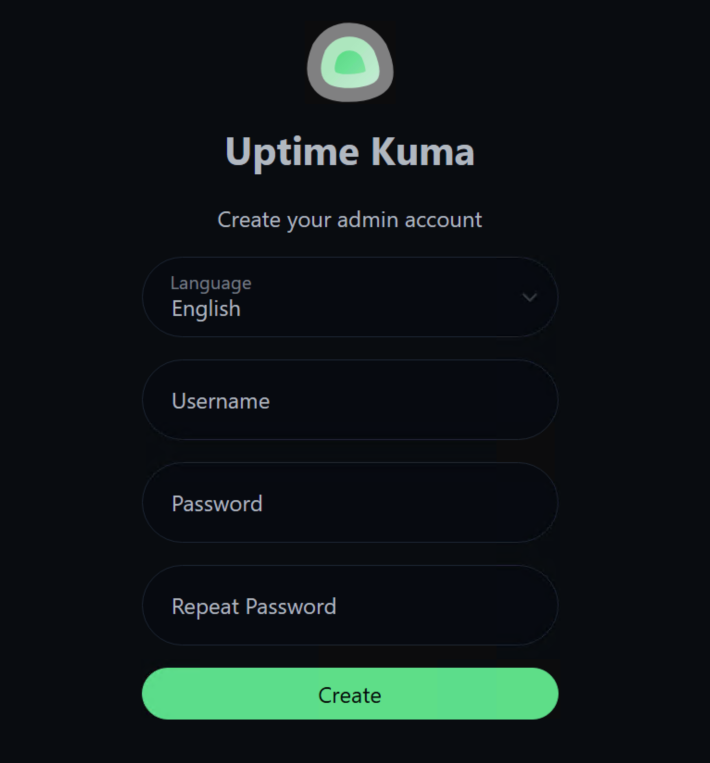
Step 8: Create your first admin account
Choose an admin username and a strong password in the web setup screen, then finish the first-run setup.
After that, you should land on the main dashboard.
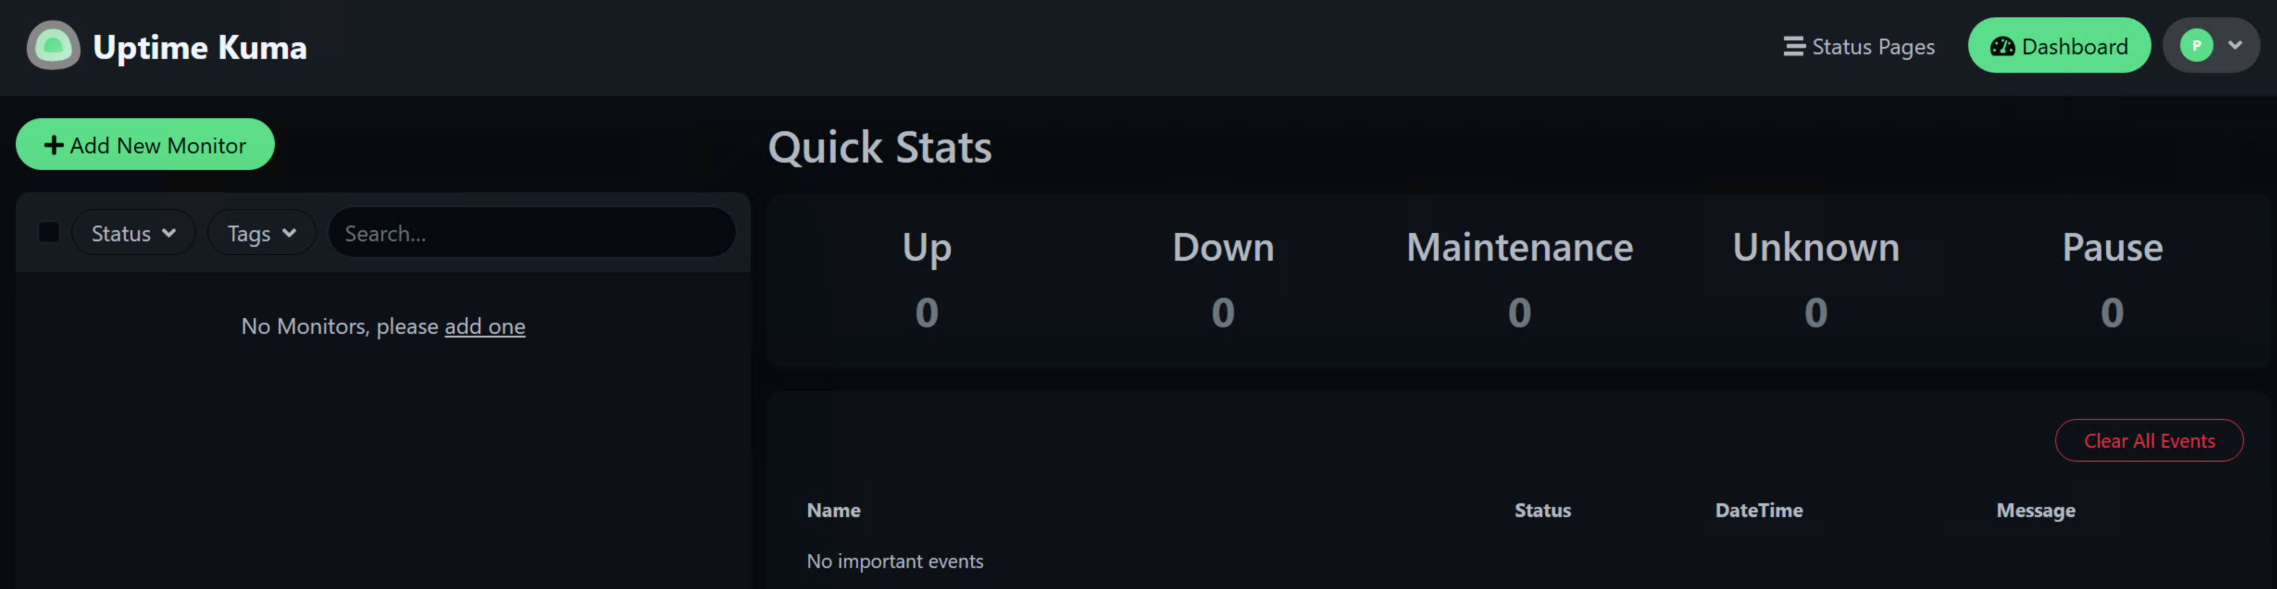
Step 9: Add your first monitor
A monitoring tool is much more charming once it has something to monitor.
Click Add New Monitor and use a simple HTTP or HTTPS target first, such as your own website, a reverse proxy host, or another app you already run.
A practical beginner example would be:
type: HTTP(s)
friendly name:
Main SiteURL:
https://your-domain.cominterval: keep the default unless you have a reason to change it
Once you save the monitor, Uptime Kuma will begin checking it on its schedule and the dashboard should start showing actual status data.
Optional: Put Uptime Kuma behind a domain and HTTPS
You do not have to do this on day one, but it makes the setup cleaner later.
One important note from the project's install wiki: Uptime Kuma uses WebSocket connections, so reverse proxy configs need the usual WebSocket upgrade headers.
If you want a cleaner URL next, use one of these:
Common problems and quick fixes
The page will not open on port 3001
Check whether the container is running.
docker compose ps
If it is running, verify that your server firewall or cloud provider firewall allows access to the port you are testing.
The container keeps restarting
Look at the recent logs.
docker compose logs --tail=100 uptime-kuma
If the data directory is on unsupported storage or permissions are broken, the logs usually point you in the right direction.
I mapped the data folder to a network share
Move it to local storage. Uptime Kuma warns that NFS-style storage is not supported for this workload.
The dashboard works directly by IP, but breaks behind a reverse proxy
Double-check your reverse proxy configuration for WebSocket support. Uptime Kuma's docs call this out specifically.
How to update Uptime Kuma
The project's update wiki shows a straightforward Docker Compose path.
Pull the newest image.
docker compose pull
Recreate the container in the background.
docker compose up -d --force-recreate
Check that it came back cleanly.
docker compose ps
Because your persistent data lives in ./data, the dashboard settings and monitor history should remain in place after the update.
How to back it up
For a basic deployment, the important thing to back up is the app data folder.
In this guide, that is:
/opt/uptime-kuma/data
A simple approach is to stop the stack briefly and archive that directory.
docker compose down
tar -czf uptime-kuma-backup.tar.gz data
Then start it again.
docker compose up -d
If you already have server-level backups or snapshot automation, make sure this folder is included.
How to remove it
If you want to remove Uptime Kuma later, stop and delete the container stack.
docker compose down
If you also want to remove the local data, delete the app directory.
cd /opt
sudo rm -rf /opt/uptime-kuma
Only do that last step if you are sure you do not need the monitor history or configuration anymore.
You're done
You now have Uptime Kuma running in Docker with persistent storage, a working admin login, and the basics needed to start monitoring your self-hosted services.
From here, the nicest next steps are usually adding a domain with HTTPS, creating a few real service checks, and turning on notifications so outages reach you before they become tiny mysteries with big consequences.