WireGuard is one of the cleanest ways to give yourself a private tunnel back into a VPS or home server without turning the setup into a whole networking side quest. Once it is running, you can reach internal services more safely on public Wi-Fi, route traffic through your own server, and keep remote admin access a little less exposed to the wider internet.
In this guide, you will set up a basic WireGuard server on Ubuntu Server 24.04 LTS, create one client profile, enable IP forwarding, open the firewall, and connect with a full-tunnel client that can send all of its traffic through your server.
OS used in this tutorial
This walkthrough is written for Ubuntu Server 24.04 LTS.
I tested this walkthrough on Ubuntu Server 24.04 LTS, so the package names, service behavior, and file paths below match that environment. If you are using Debian, Rocky Linux, Fedora, or another distro, follow the same general process but expect a few differences.
Why WireGuard is such a good first VPN
WireGuard has a lot going for it for self-hosting:
it is fast and lightweight
the config files are small enough to understand without a migraine
Ubuntu packages it directly, so you do not need a strange bootstrap process
the
wg-quicktool makes bringing the tunnel up and down pleasantly boring
That last part is a compliment, by the way. Boring infrastructure is usually the infrastructure still working next month.
If you are still building your server basics, keep this related guide handy too:
Minimum and recommended server size
The upstream WireGuard docs explain installation and configuration clearly, but they do not publish a beginner-friendly VPS sizing matrix for every scenario. In practice, WireGuard is very light.
Minimum
1 vCPU
512 MB RAM
5 GB SSD storage
That is enough for a personal VPN with one or two clients.
Recommended
1 to 2 vCPU
1 GB RAM
10 GB SSD storage
That gives you a little more breathing room for updates, logs, and any other small services you may also keep on the server.
What you need before you start
Have these ready first:
an Ubuntu Server 24.04 LTS VPS or VM
SSH access to that server
a user with
sudoaccessa public IP address or domain name for the server
a client device such as a laptop or phone where you will import the WireGuard profile later
WireGuard plan for this guide
This article uses one server and one client with these example values:
WireGuard interface name:
wg0VPN subnet:
10.8.0.0/24server VPN IP:
10.8.0.1first client VPN IP:
10.8.0.2WireGuard UDP port:
51820
The client profile in this guide uses a full-tunnel setup with AllowedIPs = 0.0.0.0/0, ::/0, which means the client can route all traffic through the VPN. If you only want to reach private resources on the server and keep normal internet traffic local, I will show the split-tunnel change near the end.
Step 1: Connect to your Ubuntu server
Run this from your local machine:
ssh your-user@your-server-ip
Replace your-user with your Ubuntu username and your-server-ip with your server's public IP address.
Step 2: Update package metadata
sudo apt update
Step 3: Install WireGuard
The current WireGuard installation page for Ubuntu documents the package install as sudo apt install wireguard.
sudo apt install wireguard
Step 4: Install a QR helper for easier mobile imports
This step is optional, but it makes phone setup much easier later.
sudo apt install qrencode
If you only plan to use a desktop or laptop client, you can skip the QR code part later.
Step 5: Find your server's public network interface
You will need the outbound interface name for NAT.
ip route list default
Typical output looks something like this:
default via 203.0.113.1 dev eth0 proto static
In that example, the public interface is eth0. On some cloud images it may be ens3 or enp1s0 instead.
Step 6: Create the WireGuard config directory if needed
sudo mkdir -p /etc/wireguard
Step 7: Create the server private key
WireGuard's quick start shows the standard wg genkey and wg pubkey flow for key generation.
wg genkey | sudo tee /etc/wireguard/server_private.key > /dev/null
Step 8: Lock down the server private key file
sudo chmod 600 /etc/wireguard/server_private.key
Step 9: Derive the server public key
sudo sh -c 'wg pubkey < /etc/wireguard/server_private.key > /etc/wireguard/server_public.key'
Step 10: Show the server public key
You will not paste this anywhere yet, but it is useful to confirm the key exists.
sudo cat /etc/wireguard/server_public.key
Step 11: Create the client private key
wg genkey | sudo tee /etc/wireguard/client1_private.key > /dev/null
Step 12: Lock down the client private key file
sudo chmod 600 /etc/wireguard/client1_private.key
Step 13: Derive the client public key
sudo sh -c 'wg pubkey < /etc/wireguard/client1_private.key > /etc/wireguard/client1_public.key'
Step 14: Create the server configuration
Before you save this file, replace eth0 in the PostUp and PostDown rules with your real public interface from Step 5 if it is different.
sudo nano /etc/wireguard/wg0.conf
Paste this configuration:
[Interface]
Address = 10.8.0.1/24
ListenPort = 51820
PrivateKey = SERVER_PRIVATE_KEY
PostUp = ufw route allow in on wg0 out on eth0
PostUp = iptables -t nat -A POSTROUTING -o eth0 -j MASQUERADE
PostDown = ufw route delete allow in on wg0 out on eth0
PostDown = iptables -t nat -D POSTROUTING -o eth0 -j MASQUERADE

[Peer]
PublicKey = CLIENT1_PUBLIC_KEY
AllowedIPs = 10.8.0.2/32
Step 15: Replace the placeholder key values in wg0.conf
Use the real contents of your key files, not the filenames themselves.
Get the server private key:
sudo cat /etc/wireguard/server_private.key
Get the client public key:
sudo cat /etc/wireguard/client1_public.key
After you replace SERVER_PRIVATE_KEY and CLIENT1_PUBLIC_KEY, save the file and exit the editor.
Step 16: Enable IPv4 forwarding now
sudo sysctl -w net.ipv4.ip_forward=1
Step 17: Make IPv4 forwarding persistent across reboots
sudo nano /etc/sysctl.d/99-wireguard.conf
Paste this line into the file:
net.ipv4.ip_forward = 1
Step 18: Load the persistent sysctl setting
sudo sysctl --system
Step 19: Allow the WireGuard UDP port through UFW
sudo ufw allow 51820/udp
If UFW is not installed or not active on your server, adapt this step to whatever firewall you are using instead.
Step 20: Start the WireGuard tunnel
Ubuntu's packaged service model uses wg-quick@wg0 for a config file named /etc/wireguard/wg0.conf.
sudo systemctl start wg-quick@wg0
Step 21: Enable WireGuard at boot
sudo systemctl enable wg-quick@wg0
Step 22: Check the service status
systemctl status wg-quick@wg0 --no-pager
You want to see that the service is active.
Step 23: Confirm WireGuard sees the interface
sudo wg show
Before the client connects, you should at least see the interface, listening port, and peer public key.
Step 24: Create the client config file on the server
This makes it easy to copy one clean profile to your laptop or phone.
sudo nano /etc/wireguard/client1.conf
Paste this template, then replace YOUR_SERVER_PUBLIC_IP_OR_DOMAIN with your real server endpoint and CLIENT1_PRIVATE_KEY with the contents of your private key file.
[Interface]
Address = 10.8.0.2/32
PrivateKey = CLIENT1_PRIVATE_KEY
DNS = 1.1.1.1

[Peer]
PublicKey = SERVER_PUBLIC_KEY
Endpoint = YOUR_SERVER_PUBLIC_IP_OR_DOMAIN:51820
AllowedIPs = 0.0.0.0/0, ::/0
PersistentKeepalive = 25
Step 25: Gather the values for client1.conf
Get the client private key:
sudo cat /etc/wireguard/client1_private.key
Get the server public key:
sudo cat /etc/wireguard/server_public.key
Paste those values into /etc/wireguard/client1.conf, save the file, and exit the editor.
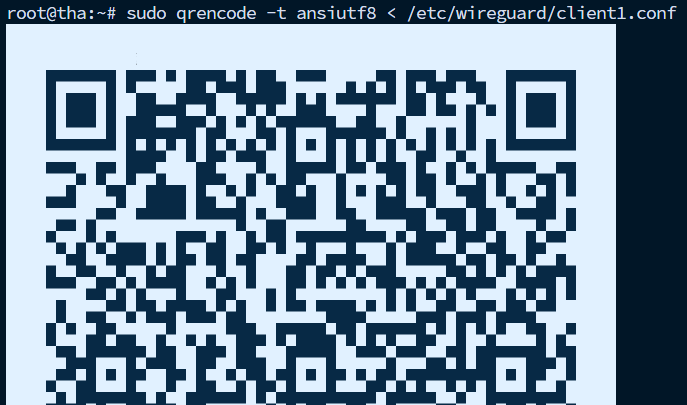
Step 26: Show the client config as a QR code for a phone import
If you installed qrencode, this is the fastest import path for the mobile WireGuard app.
sudo qrencode -t ansiutf8 < /etc/wireguard/client1.conf
Point the WireGuard mobile app at that QR code and import the tunnel.
If you are using a desktop client instead, securely copy the contents of /etc/wireguard/client1.conf into the WireGuard app on that device.
Step 27: Connect the client
Activate the imported tunnel in the WireGuard app on your phone or computer.
For a first test, keep the server terminal open so you can check the handshake immediately afterward.
Step 28: Verify the handshake on the server
sudo wg show
Once the client connects, you should see a recent handshake time and some transfer counters under the peer section.
Step 29: Test your public IP from the client
From the connected client, open a browser and check a service such as https://ifconfig.me or another IP-echo site you trust.
If the VPN is working as a full tunnel, the reported public IP should be your server's public IP, not the client device's usual home or mobile IP.
Optional: switch this client to split tunnel instead of full tunnel
If you only want secure access to the WireGuard subnet and do not want to route all internet traffic through the server, edit the client config and replace this line:
AllowedIPs = 0.0.0.0/0, ::/0
with this line:
AllowedIPs = 10.8.0.0/24
Then disconnect and reconnect the client tunnel.
Troubleshooting tips
The service will not start
Run this to see the most useful recent logs:
journalctl -u wg-quick@wg0 -n 50 --no-pager
The most common causes are:
a malformed
wg0.confplaceholder text still left in the config
the wrong outbound interface in the
PostUpandPostDownrulesa permissions problem on the private key files
The client connects but there is no internet through the tunnel
Check these first:
net.ipv4.ip_forwardis enabledUDP
51820is open in the firewallthe NAT rules use the correct public interface name
the client endpoint points to the correct public IP or domain
The handshake never appears
That usually means one of four things:
the server endpoint is wrong
the UDP port is blocked
the client was imported with the wrong keys
the client tunnel is still disabled
What to do next
Once WireGuard is working, you have a nice base for safer remote admin access, private app access, or a full-tunnel travel VPN.
Good follow-up ideas after this one:
tighten the underlying host with How to Harden a VPS with SSH Keys, UFW, and Fail2ban on Ubuntu
put browser-based apps behind a domain and HTTPS with How to Use Caddy as a Reverse Proxy for Self-Hosted Apps
add monitoring so you notice outages before your future self starts muttering at public Wi-Fi
Frequently Asked Questions
Do I need a domain name for WireGuard?
Should I use TCP or UDP for WireGuard?
Can I add more than one client later?
Was this article helpful?
Let me know so I can keep improving.