Syncthing is one of the simplest ways to keep files in sync without handing your data to a third-party cloud service. It works especially well when you want a personal file sync setup between a VPS, a home server, and your own devices, but you still want something lighter and more peer-to-peer than a full private cloud platform.
In this guide, you will install Syncthing on Ubuntu using the official Debian and Ubuntu repository, add a systemd service for server use, allow the sync ports through UFW when needed, and reach the admin interface over an SSH tunnel instead of exposing it directly on the public internet.
Why this setup is a good starting point
The official Syncthing documentation points Ubuntu and Debian users to the project's APT repository, and the systemd documentation describes the system service model as the right fit for servers. In practice, the package install gives you the Syncthing binary, and some installs do not provide the systemd unit automatically, so this guide includes the service setup explicitly. The same docs also show that the web GUI listens on 127.0.0.1:8384 by default, which is a good security default for a remote Linux host.
That makes this a clean beginner-friendly pattern:
install from the official Syncthing repository
add the upstream systemd unit if your install did not place one on disk
keep the GUI bound to localhost
use SSH port forwarding when you need to manage it remotely
If you are still setting up your server basics, these guides are worth keeping open in another tab:
How to Install Docker on Ubuntu and Run Your First Container
How to Harden a VPS with SSH Keys, UFW, and Fail2ban on Ubuntu
If what you really want is a browser-first private cloud rather than device-to-device sync, this is the most relevant follow-up:
What you need before you start
Have these ready first:
an Ubuntu or Debian server with SSH access
a normal Linux user account with
sudoaccessUFW installed if you want simple firewall management
a second device ready later if you want to test a real sync relationship right away
Important: This tutorial keeps the Syncthing web GUI private by default. You will manage it through SSH tunneling instead of changing the GUI to listen on
0.0.0.0.
Step 1: Connect to your server
All installation commands run on the Ubuntu server over SSH.
ssh your-user@your-server-ip
Replace your-user with your actual Linux username and your-server-ip with the server's IP address or hostname.
Step 2: Add the Syncthing release key
The official Syncthing APT repository uses its own signed package source, so start by creating the keyring directory.
sudo mkdir -p /etc/apt/keyrings
Now download the Syncthing release key into that keyring location.
sudo curl -L -o /etc/apt/keyrings/syncthing-archive-keyring.gpg https://syncthing.net/release-key.gpg
Step 3: Add the official Syncthing APT repository
The Syncthing project currently documents stable-v2 as the stable channel for Debian and Ubuntu packages.
echo "deb [signed-by=/etc/apt/keyrings/syncthing-archive-keyring.gpg] https://apt.syncthing.net/ syncthing stable-v2" | sudo tee /etc/apt/sources.list.d/syncthing.list
If tee prints the repository line back to you, the source file was created successfully.
Step 4: Update APT package metadata
Refresh package metadata so Ubuntu can see the new repository.
sudo apt-get update
Step 5: Install Syncthing
Install the package from the newly added repository.
sudo apt-get install syncthing
When the install finishes, Ubuntu should place the Syncthing binary on the server. Depending on the package source and current packaging, you may or may not also get a ready-made systemd unit file.
Step 6: Add the systemd unit if it is missing
Before enabling Syncthing at boot, check whether your install already provided a unit file.
systemctl status syncthing
If you already see [email protected], you can skip to the next step.
If the command returns a "not found" result, install the upstream system service unit file.
sudo curl -L -o /etc/systemd/system/[email protected] https://raw.githubusercontent.com/syncthing/syncthing/main/etc/linux-systemd/system/[email protected]
Then reload systemd so it sees the new unit.
sudo systemctl daemon-reload
Step 7: Start Syncthing as a system service
The Syncthing docs describe the system service model as the intended choice for server use because it keeps Syncthing running even without an active login session.
Enable and start the service for your current Linux account.
sudo systemctl enable --now syncthing@$USER.service
This command tells systemd to run Syncthing as your user while still starting it as a system-managed service at boot.
Step 8: Confirm the service is running
Check that systemd shows the service as active.
systemctl status syncthing@$USER.service --no-pager
You want to see active (running) in the output.
You can also check recent logs if you want confirmation that the GUI is listening locally.
journalctl -u syncthing@$USER.service -n 30 --no-pager
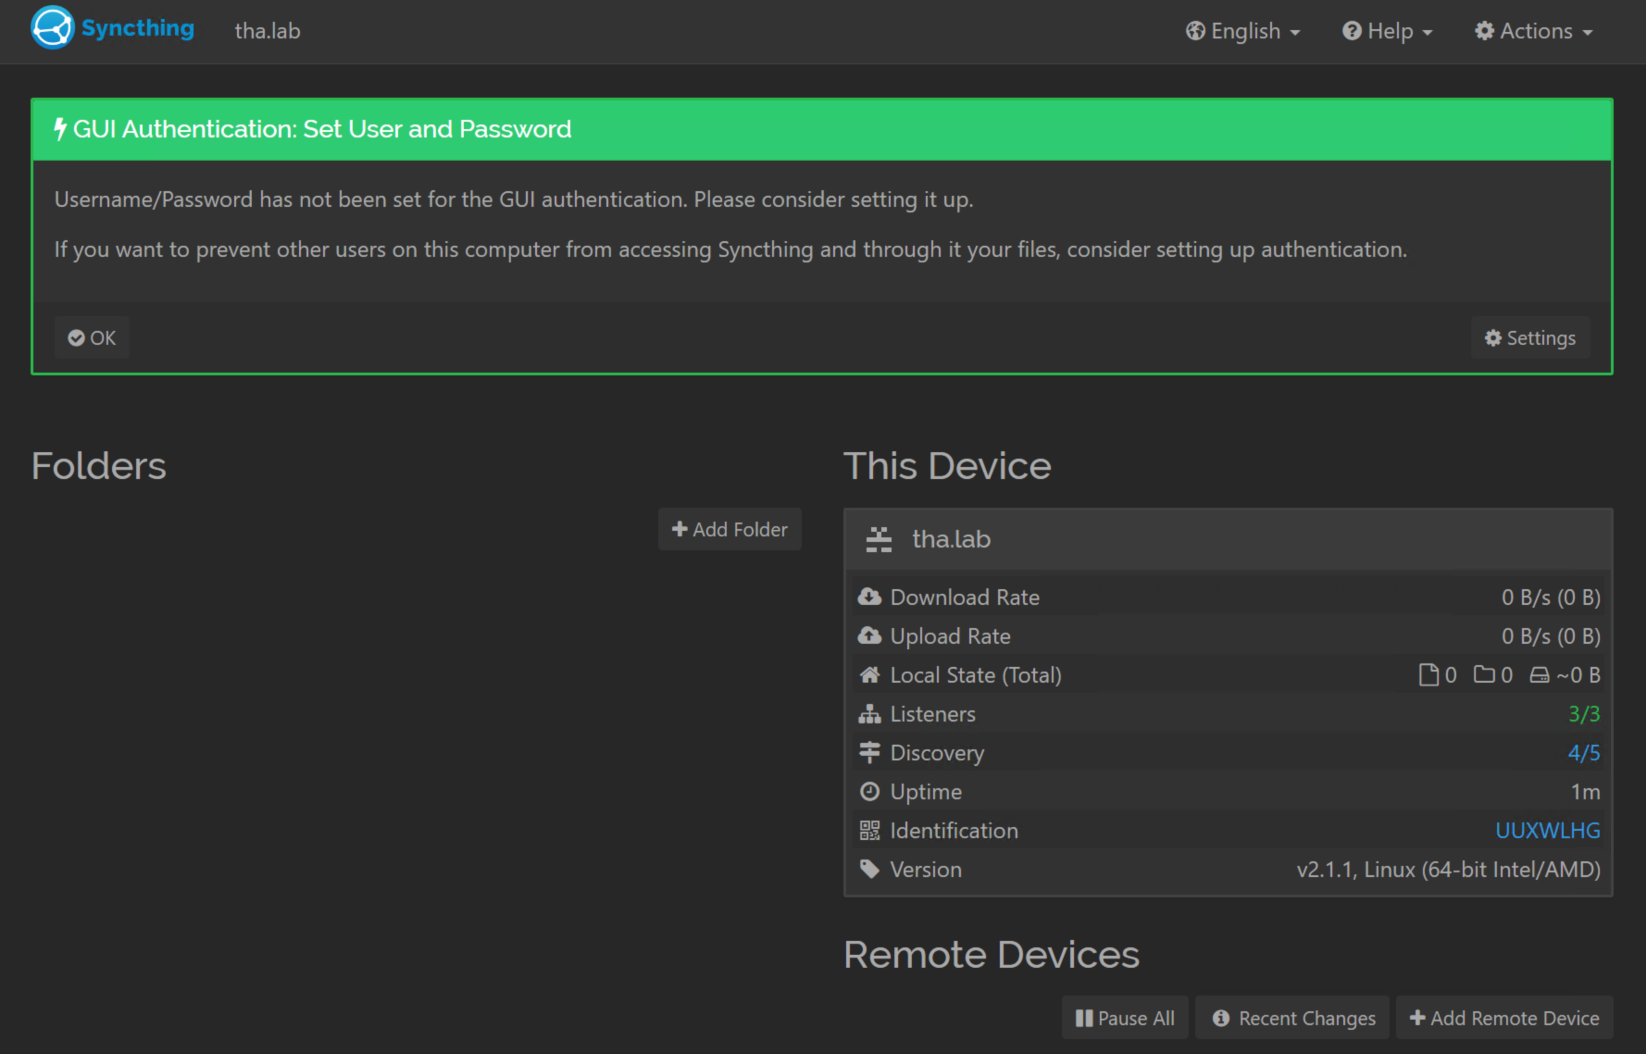
In a normal first start, Syncthing should create its initial configuration, generate its device ID, and report that the GUI is listening on 127.0.0.1:8384.
Step 9: Allow Syncthing's sync traffic through UFW
According to the official firewall documentation, Syncthing typically needs the sync protocol ports and discovery traffic allowed, and the packaged install includes a convenient UFW app profile.
sudo ufw allow syncthing
This is the normal firewall rule for device-to-device syncing.
Check the firewall status if you want to confirm the rule landed.
sudo ufw status verbose
Important: You do not need to allow the Syncthing GUI externally for a typical server install. Skip
syncthing-guiunless you have a very specific reason and understand the security trade-offs.
Step 10: Open the Syncthing web GUI safely with an SSH tunnel
By default, Syncthing keeps the admin GUI on 127.0.0.1:8384, which means it is only reachable from the server itself. That is a good default, but it also means you should tunnel the port over SSH when managing a remote VPS.
Run the following command from your local computer, not from inside the existing remote shell.
ssh -L 8384:127.0.0.1:8384 your-user@your-server-ip
Keep that SSH session open while you use the GUI.
Then, on your local computer, open this address in your browser:
http://127.0.0.1:8384
If the page does not load, double-check three things:
the
syncthing@$USER.serviceunit is running on the serverthe SSH tunnel command is still open on your local machine
you opened
http://127.0.0.1:8384locally instead of the server IP in the browser
Step 11: Review the first-run Syncthing layout
On a first launch, Syncthing usually creates a default folder named Default Folder and shows your local device on the right side of the dashboard. The official getting started guide uses that same default state as its starting point.
A few things to notice right away:
your Device ID is available from Actions → Show ID
the web GUI manages both folders and remote devices
the default sync folder normally lives in
~/Syncno real synchronization happens until another device is added and both sides trust each other
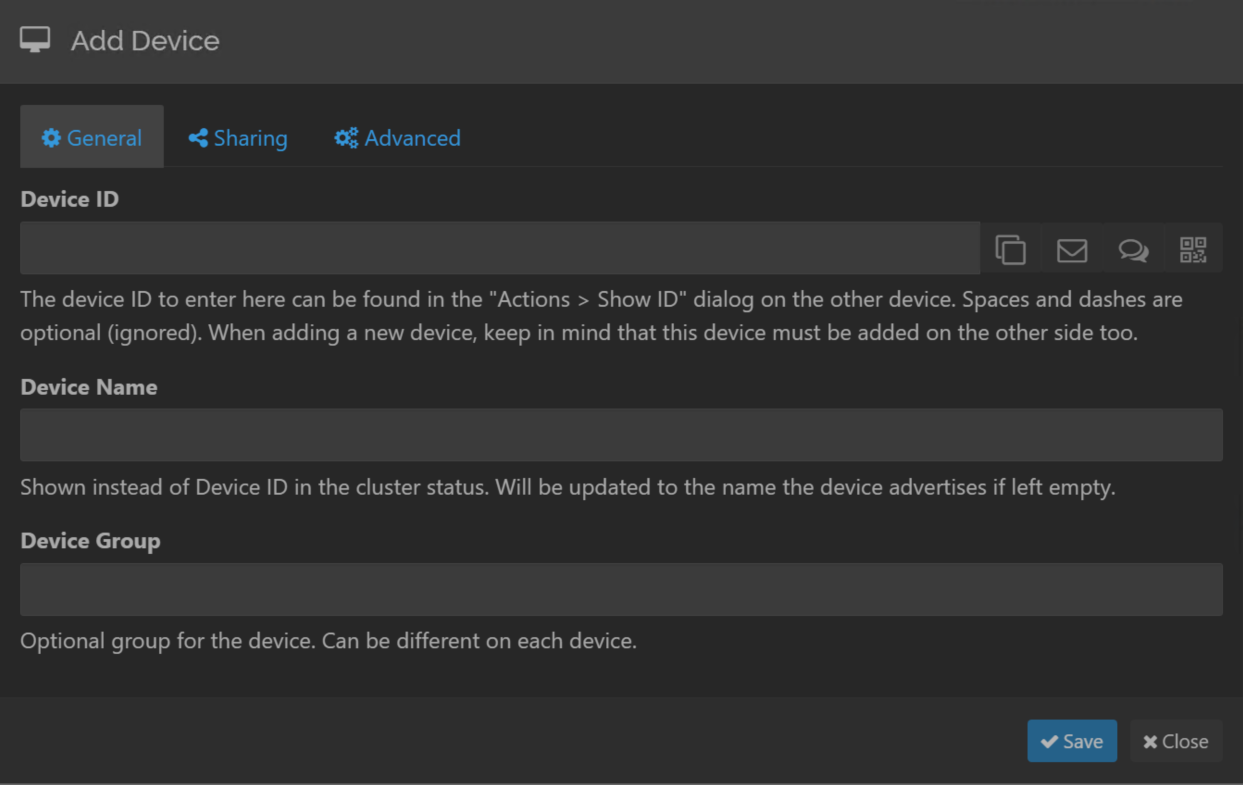
Step 12: Add a second device
To sync files, Syncthing requires both devices to know about each other. The official docs describe this as a mutual exchange of device IDs.
On the server-side Syncthing dashboard:
open Actions
click Show ID
copy the server's device ID
click Add Remote Device
enter the device ID from your second machine
choose which folder to share
save the change
Repeat the same trust step on the second device so both sides approve the relationship.
Once both sides accept the share, Syncthing should connect automatically and begin syncing any files placed in the shared folder.
Step 13: Verify that syncing works
The quickest real-world test is to place a small file into the shared folder on one side and make sure it appears on the other.
For example, if you are using the default folder on the server, create a test file like this:
touch ~/Sync/syncthing-test-file.txt
Within a short time, that file should appear on the paired device if both devices are online and the folder was shared correctly.
Common mistakes to avoid
Opening the server IP on port 8384 directly
For this setup, the browser should connect to http://127.0.0.1:8384 on your local computer through the SSH tunnel. Going straight to http://your-server-ip:8384 will usually fail unless you changed the GUI bind address and opened the firewall.
Forgetting that both devices must approve each other
Syncthing is not a one-sided invite system. The official getting started flow requires each device to know about the other before a connection is established.
Using the GUI port rule when you only needed sync traffic
Most people only need the normal Syncthing sync traffic allowed. Opening the web GUI externally is unnecessary for many home server and VPS setups.
How to update Syncthing later
Because Syncthing was installed through APT, future updates are straightforward.
sudo apt-get update
sudo apt-get install --only-upgrade syncthing
If the package updates while the service is installed normally, restarting the service is a safe follow-up step.
sudo systemctl restart syncthing@$USER.service
Where to go next
Once the basic install is working, the next useful improvements are usually:
pairing your server with a laptop, desktop, or phone
replacing the default shared folder with a path that better matches your workflow
monitoring the server itself with a tool like Uptime Kuma
deciding whether Syncthing or a browser-first platform like Nextcloud is the better long-term fit for your files
Final thoughts
Syncthing is a great option when you want private file sync without building a full collaboration suite around it. Installing it from the official repository on Ubuntu gives you a cleaner update path, and keeping the web GUI behind an SSH tunnel makes the whole setup much safer for beginners than exposing the admin port on day one.
If your goal is simple, reliable sync between your own devices, this setup gets you there without much operational overhead.