
I still think the normal OpenClaw installer is the easiest first run for most people. Docker Compose starts to make sense when your Ubuntu 24.04 LTS VPS already runs other apps in containers and you want OpenClaw to fit into the same routine for config, logs, and updates.
Here I'll use the official Docker setup, keep the important state on the host, and make sure the Control UI works before you start adding channels, plugins, or anything more ambitious. If you want the native install path instead, use How to Install OpenClaw on Ubuntu and Complete Your First Setup first.
Minimum and recommended VPS sizing
OpenClaw's Docker docs call out 2 GB RAM as the practical floor for image builds because 1 GB hosts can run out of memory. The project does not publish a full hardware matrix for every Docker scenario, so treat these as sensible planning numbers rather than hard limits.
Minimum test box: 2 vCPU, 2 GB RAM, 20 GB storage
Recommended starter VPS: 2 vCPU, 4 GB RAM, 30 to 40 GB storage
More comfortable long-running setup: 4 vCPU, 8 GB RAM, 50+ GB storage if you expect more logs, plugins, or local-model experiments
If you already know you'll add extra tooling later, skip the tiny VPS. Paying a little more up front is usually better than fighting memory pressure and disk limits a few days later.
When Docker Compose is the better fit
I would use this route when you want:
a containerized Gateway instead of a host-level install
easier separation between app runtime and host OS packages
a persistent config and workspace mounted from the host
a more familiar Compose-based update routine
a cleaner base for later reverse proxying or container-focused automation
If your only goal is "get OpenClaw running as fast as possible," the native installer is still simpler.
What persists in this setup
The official Docker flow bind-mounts the important OpenClaw state back to the Ubuntu host:
the config directory for
openclaw.jsonthe workspace directory
the auth-profile secret directory
the OpenClaw
.envused for runtime secrets such as the Gateway token
You can also persist /home/node with OPENCLAW_HOME_VOLUME so upgrades do not wipe state that lives in the OpenClaw home directory. That matters if you later install extra tools inside the container, including Claude Code.
Before you start
This guide assumes:
Ubuntu 24.04 LTS
Docker Engine already installed
the Docker Compose plugin available as
docker composea user account with
sudoSSH access to the server
a model-provider API key or another supported auth method ready for onboarding
a normal user account that can talk to Docker without
sudo
If Docker is not ready yet, use How to Install Docker on Ubuntu and Run Your First Container and Docker Compose for Self-Hosted Apps: A Beginner-Friendly Guide before you continue.
Step 1: Connect to the server
SSH into the Ubuntu host from your local machine.
ssh your-user@your-server-ip
Step 2: Verify Docker access before you run the OpenClaw setup
From the server shell, make sure your normal user can talk to Docker without sudo.
docker ps
If that prints a permission error for /var/run/docker.sock, add your user to the docker group.
sudo usermod -aG docker "$USER"
The cleanest fix is to disconnect and SSH back in so your new group membership is picked up automatically. If you want a quicker in-place refresh for the current shell, run:
newgrp docker
Then verify Docker access again:
docker ps
If newgrp docker does not behave the way you want in your current session, just reconnect over SSH and rerun docker ps.
Step 3: Install Git if it is missing
The official Docker flow starts from the OpenClaw repository, so first make sure git is available.
git --version
If Ubuntu says the command is missing, install it.
sudo apt update
sudo apt install -y git
Step 4: Clone OpenClaw into /opt
Create a predictable working location for the stack.
sudo mkdir -p /opt/openclaw
Give your normal user ownership of that directory.
sudo chown "$USER":"$USER" /opt/openclaw
Move into it.
cd /opt/openclaw
Clone the repository.
git clone https://github.com/openclaw/openclaw.git
Enter the project directory.
cd openclaw
Step 5: Tell the setup script to use the official image and a persistent home volume
The Docker docs support either a locally built image or an official prebuilt image from GHCR. For a beginner VPS setup, I prefer the official image because it avoids an unnecessary local build on the first day.
Export the image choice.
export OPENCLAW_IMAGE="ghcr.io/openclaw/openclaw:latest"
Export a named volume for /home/node persistence.
export OPENCLAW_HOME_VOLUME="openclaw_home"
That extra volume is easy to skip, but it helps later. If you add container-side tools after the first install, keeping /home/node persistent makes upgrades much less annoying.
Step 6: Run the official Docker setup script
Start the official setup flow from your normal user shell.
./scripts/docker/setup.sh
Do not switch straight to sudo ./scripts/docker/setup.sh just to get around Docker socket permissions. If you do that, sudo can drop OPENCLAW_IMAGE and OPENCLAW_HOME_VOLUME, which makes the script fall back to openclaw:local, and it can also change HOME to /root, which makes OpenClaw read and write config under /root/.openclaw instead of your user profile.
If you absolutely must run the setup through sudo, preserve the variables and force your real home directory explicitly:
sudo env \
  HOME="$HOME" \
  OPENCLAW_IMAGE="$OPENCLAW_IMAGE" \
  OPENCLAW_HOME_VOLUME="$OPENCLAW_HOME_VOLUME" \
  ./scripts/docker/setup.sh
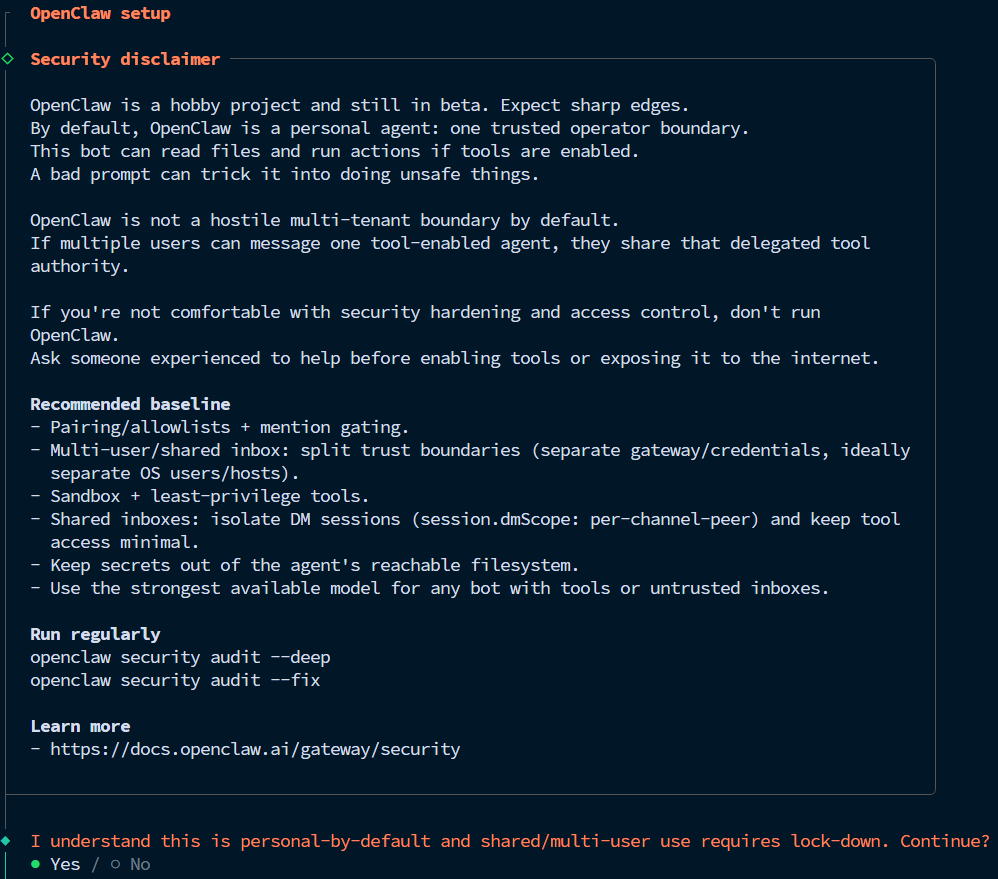
The script handles the parts that are easy to get wrong by hand:
onboarding prompts
Gateway token generation and
.envcreationauth-profile secret directory setup
Docker Compose startup
Step 7: Check that the containers are up
Confirm the Compose services are running.
docker compose ps
You should see the Gateway container up, and the health column should settle into a healthy state after startup.
For a quick liveness check from the host, hit the built-in endpoint.
curl -fsS http://127.0.0.1:18789/healthz
Then confirm readiness too.
curl -fsS http://127.0.0.1:18789/readyz
If either check fails, look at the logs before changing config.
docker compose logs --tail=100 openclaw-gateway
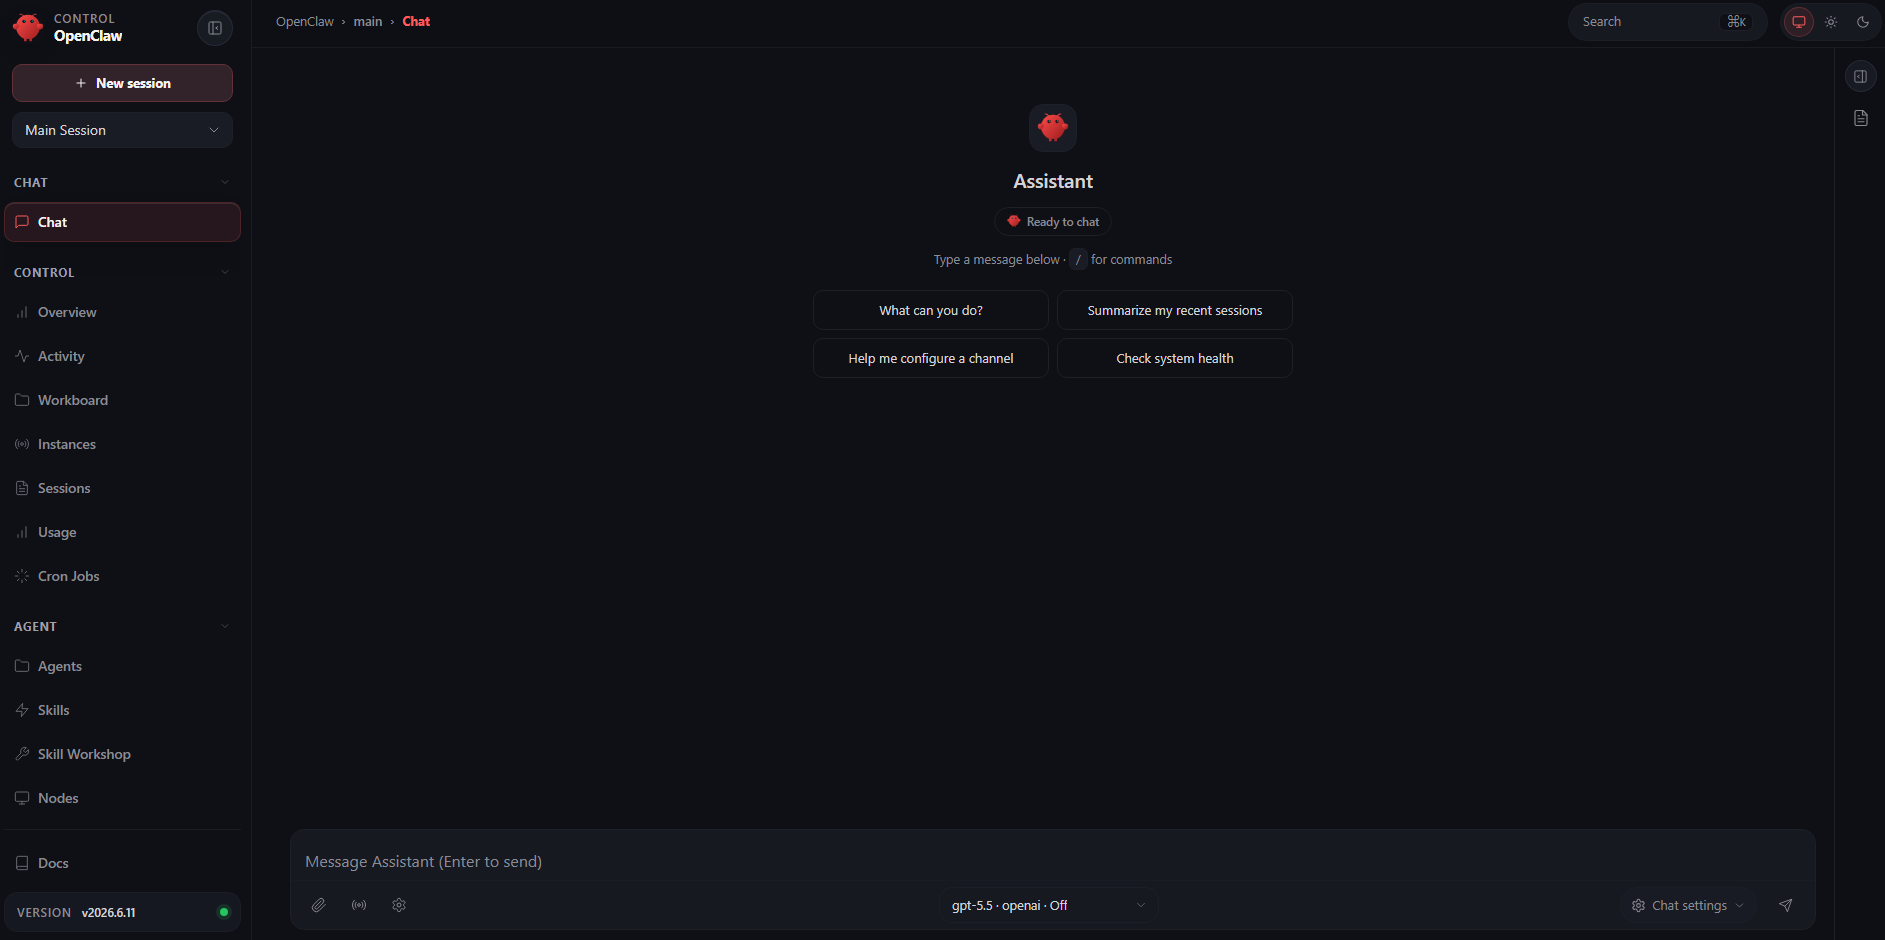
Step 8: Open the Control UI safely from your own computer
On a public VPS, I would not rush to expose the Gateway directly on day one. Tunnel to the host over SSH first.
From your local machine, open a tunnel back to the server:
ssh -N -L 18789:127.0.0.1:18789 your-user@your-server-ip
Then open this in your local browser:
http://127.0.0.1:18789/
When the browser shows Auth required, copy the token from the project .env file on the server and paste it into the prompt.
grep '^OPENCLAW_GATEWAY_TOKEN=' .env
Copy only the value after =. The setup script normally writes this token during onboarding, so in the Docker flow that .env value is the first place to check.
If the token is missing from .env, check the running gateway container:
docker compose exec openclaw-gateway printenv OPENCLAW_GATEWAY_TOKEN
If that is also empty, generate a fresh token inside the containerized setup instead of falling back to the host-native CLI flow:
docker compose exec openclaw-gateway node dist/index.js doctor --generate-gateway-token
For this Docker workflow, prefer the SSH-tunnel URL above instead of docker compose run --rm openclaw-cli dashboard --no-open. That CLI helper can fall back to host-daemon readiness checks and may try to install a native systemd-managed gateway, which is the wrong path inside the containerized setup.
If you want to confirm the containerized Gateway is responding before opening the browser, use a direct HTTP check from the server instead:
curl -fsS http://127.0.0.1:18789/healthz
Step 9: Approve the browser device if pairing is still pending
If the dashboard shows a pairing request, list pending devices from the server.
docker compose run --rm openclaw-cli devices list
Approve the request with the ID you see.
docker compose run --rm openclaw-cli devices approve your-request-id
After that, refresh the browser and send a simple test prompt.
Host-side model runtimes need a Docker-aware URL
One Docker gotcha is worth calling out early: 127.0.0.1 inside the container is not your Ubuntu host. If you plan to point OpenClaw at Ollama or LM Studio running on the host later, use host.docker.internal instead.
Examples from the docs:
Ollama on the host:
http://host.docker.internal:11434LM Studio on the host:
http://host.docker.internal:1234
That one detail saves a lot of pointless troubleshooting.
Safe update routine for this Docker setup
The OpenClaw Docker docs note that the setup script rewrites the project .env from your current shell and its defaults. Before rerunning it on an existing install, reload the saved values first.
Go back to the project directory if needed.
cd /opt/openclaw/openclaw
Load the current Docker-side variables into your shell.
set -a && . ./.env && set +a
Reassert the persistent home volume if it is not already in the file.
export OPENCLAW_HOME_VOLUME="${OPENCLAW_HOME_VOLUME:-openclaw_home}"
Pull the latest repository changes.
git pull
Rerun the setup script.
./scripts/docker/setup.sh
Finish with a quick health check.
docker compose ps
If you want shorter day-to-day commands later, OpenClaw's optional ClawDock helpers can wrap the usual Compose tasks. I would still get comfortable with the plain commands first so you know what the stack is doing under the hood.
Where to go next
Once the Docker deployment is working, these are the next guides I would keep nearby:
OpenClaw Configuration Guide for Beginners: The Settings That Matter First
OpenClaw Troubleshooting Guide: Fix Common Setup and Runtime Problems
That is a good order to follow. Get the containerized Gateway stable first, tune the config second, and worry about public access or more advanced integrations after that.
Frequently Asked Questions
Is Docker Compose the best first way to run OpenClaw?
What actually stays persistent in the Docker setup?
Can OpenClaw in Docker talk to a model runtime on the host?
Was this article helpful?
Let me know so I can keep improving.