If your desk has become a natural habitat for mystery receipts, PDFs, and scanned paperwork you swear you will organize later, Paperless-ngx is a very practical fix. It gives you a self-hosted document archive with OCR, tags, search, and inbox-style processing, so your server can become the grown-up filing cabinet your kitchen counter never wanted to be.
In this guide, you will deploy Paperless-ngx with Docker Compose on a Linux server, using the official PostgreSQL-based template recommended for new installs. By the end, you will have a working web app, persistent storage, and a clean base you can later place behind HTTPS.
What Paperless-ngx does well
Paperless-ngx is built for storing and organizing documents such as bills, tax files, letters, manuals, and contracts. It can OCR scanned files, pull metadata from documents, and help you sort everything into a searchable archive instead of a folder named stuff-final-final-actually-final.
For a self-hosted setup, it is especially appealing because:
your documents stay under your control
OCR and indexing happen on your own server
you can import files from a watched folder
tags, correspondents, and document types make long-term organization easier
it is useful immediately, even for a one-person setup
Why use Docker Compose here?
Paperless-ngx officially supports Docker Compose and provides ready-made Compose templates for common setups. That makes it a strong fit for this site's beginner-friendly workflow because you can start from the upstream files instead of inventing your own stack from scratch.
This tutorial uses the official PostgreSQL template because the Paperless-ngx setup docs recommend PostgreSQL for new installations. You can run SQLite instead, but PostgreSQL is the better default if you want a setup that is easier to grow later.
If you still need the foundations first, start with these guides:
How to Install Docker on Ubuntu and Run Your First Container
Docker Compose for Self-Hosted Apps: A Beginner-Friendly Guide
What you will need
Before you start, have these ready:
a Linux server or VPS
SSH access to that server
Docker installed and working
the Docker Compose plugin available as
docker composeat least 2 GB of RAM for a comfortable small setup
enough disk space for your documents and future growth
about 15 to 20 minutes
You do not need a domain name to get started. This tutorial uses your server IP first and leaves reverse proxy and HTTPS as a follow-up step.
Helpful follow-up guides:
How this install works
The official Paperless-ngx Compose setup uses three moving parts:
a
webservercontainer for the app itselfa
brokercontainer running Redisa
dbcontainer running PostgreSQL
You will download the official template files, make a few small edits, then start the stack. After that, you will open the web interface and create your first superuser account in the browser.
Step 1: Connect to your server
Use SSH from your local machine.
ssh your-user@your-server-ip
Replace your-user with your Linux username and your-server-ip with the public IP address of your server.
If this is your first login from that device, SSH may ask whether you trust the host key. That is normal.
Step 2: Create a folder for Paperless-ngx
Make a dedicated app directory so the stack is easy to manage later.
sudo mkdir -p /opt/paperless-ngx
Give your normal user ownership of the directory.
sudo chown "$USER":"$USER" /opt/paperless-ngx
Move into the new directory.
cd /opt/paperless-ngx
Step 3: Download the official Compose files
Paperless-ngx provides ready-made files for the Compose setup. This guide uses the official PostgreSQL template without the optional Tika add-on so the starting stack stays simpler.
Download the Compose file.
curl -O https://raw.githubusercontent.com/paperless-ngx/paperless-ngx/main/docker/compose/docker-compose.postgres.yml
Rename it to the standard Docker Compose filename.
mv docker-compose.postgres.yml docker-compose.yml
Download the Paperless-ngx environment file.
curl -O https://raw.githubusercontent.com/paperless-ngx/paperless-ngx/main/docker/compose/docker-compose.env
Download the companion .env file.
curl -O https://raw.githubusercontent.com/paperless-ngx/paperless-ngx/main/docker/compose/.env
The .env file sets the Compose project name, while docker-compose.env holds Paperless-ngx settings such as timezone, URL, OCR language, and user mapping.
Step 4: Create the import and export folders
The official Compose template bind-mounts ./consume and ./export, so create them now.
mkdir -p consume
mkdir -p export
The consume folder is the drop-in inbox for documents you want Paperless-ngx to ingest automatically later.
Step 5: Check your user and group IDs
Paperless-ngx can map file ownership more cleanly when you set your host UID and GID in docker-compose.env.
Show your user ID.
id -u
Show your group ID.
id -g
You will use those two numbers in the next step.
Step 6: Edit docker-compose.env
Open the environment file.
nano docker-compose.env
For a simple first deployment, find or add these lines and adjust them for your server:
USERMAP_UID=1000
USERMAP_GID=1000
PAPERLESS_TIME_ZONE=Etc/UTC
PAPERLESS_OCR_LANGUAGE=eng
# PAPERLESS_URL=http://YOUR_SERVER_IP:8000
Replace 1000 values with the output from id -u and id -g if your server uses different numbers.
A few notes:
USERMAP_UIDandUSERMAP_GIDhelp the container write files with host-friendly ownershipPAPERLESS_TIME_ZONEshould match your real timezone if you care about timestampsPAPERLESS_OCR_LANGUAGEsets the default OCR language for most documentsPAPERLESS_URLmatters more once you place the app behind a domain and HTTPS, but it is useful to set later
If most of your documents are in another language, change eng now.
Step 7: Review the Compose file ports and defaults
Open the Compose file.
nano docker-compose.yml
By default, the web app listens on port 8000 and the upstream template maps it like this:
ports:
  - "8000:8000"
That is fine for a first deployment. Change only the left side if port 8000 is already in use on your server.
You will also see these main services:
brokerfor Redisdbfor PostgreSQLwebserverfor Paperless-ngx
Unless you already know you need a different layout, keep the rest of the official file as-is.
Step 8: Pull the container images
Download the images before starting the stack.
docker compose pull
This may take a few minutes the first time.
Step 9: Start Paperless-ngx
Launch the stack in the background.
docker compose up -d
Check whether the containers are running.
docker compose ps
A healthy first result should show the broker, db, and webserver services up.
If one of them keeps restarting, jump to the troubleshooting section before moving on.
Step 10: Open the web interface and create your first account
After about a minute (the web server container tends to start slower than the others, I've noticed), in your browser, visit:
http://your-server-ip:8000
On a first run, Paperless-ngx should prompt you to create a superuser account.

Create a strong username and password, then sign in.
Because Paperless-ngx superusers can access everything, many people later create a separate daily-use account once the system is set up.
Step 11: Confirm the dashboard loads
After logging in, you should land in the main Paperless-ngx dashboard.
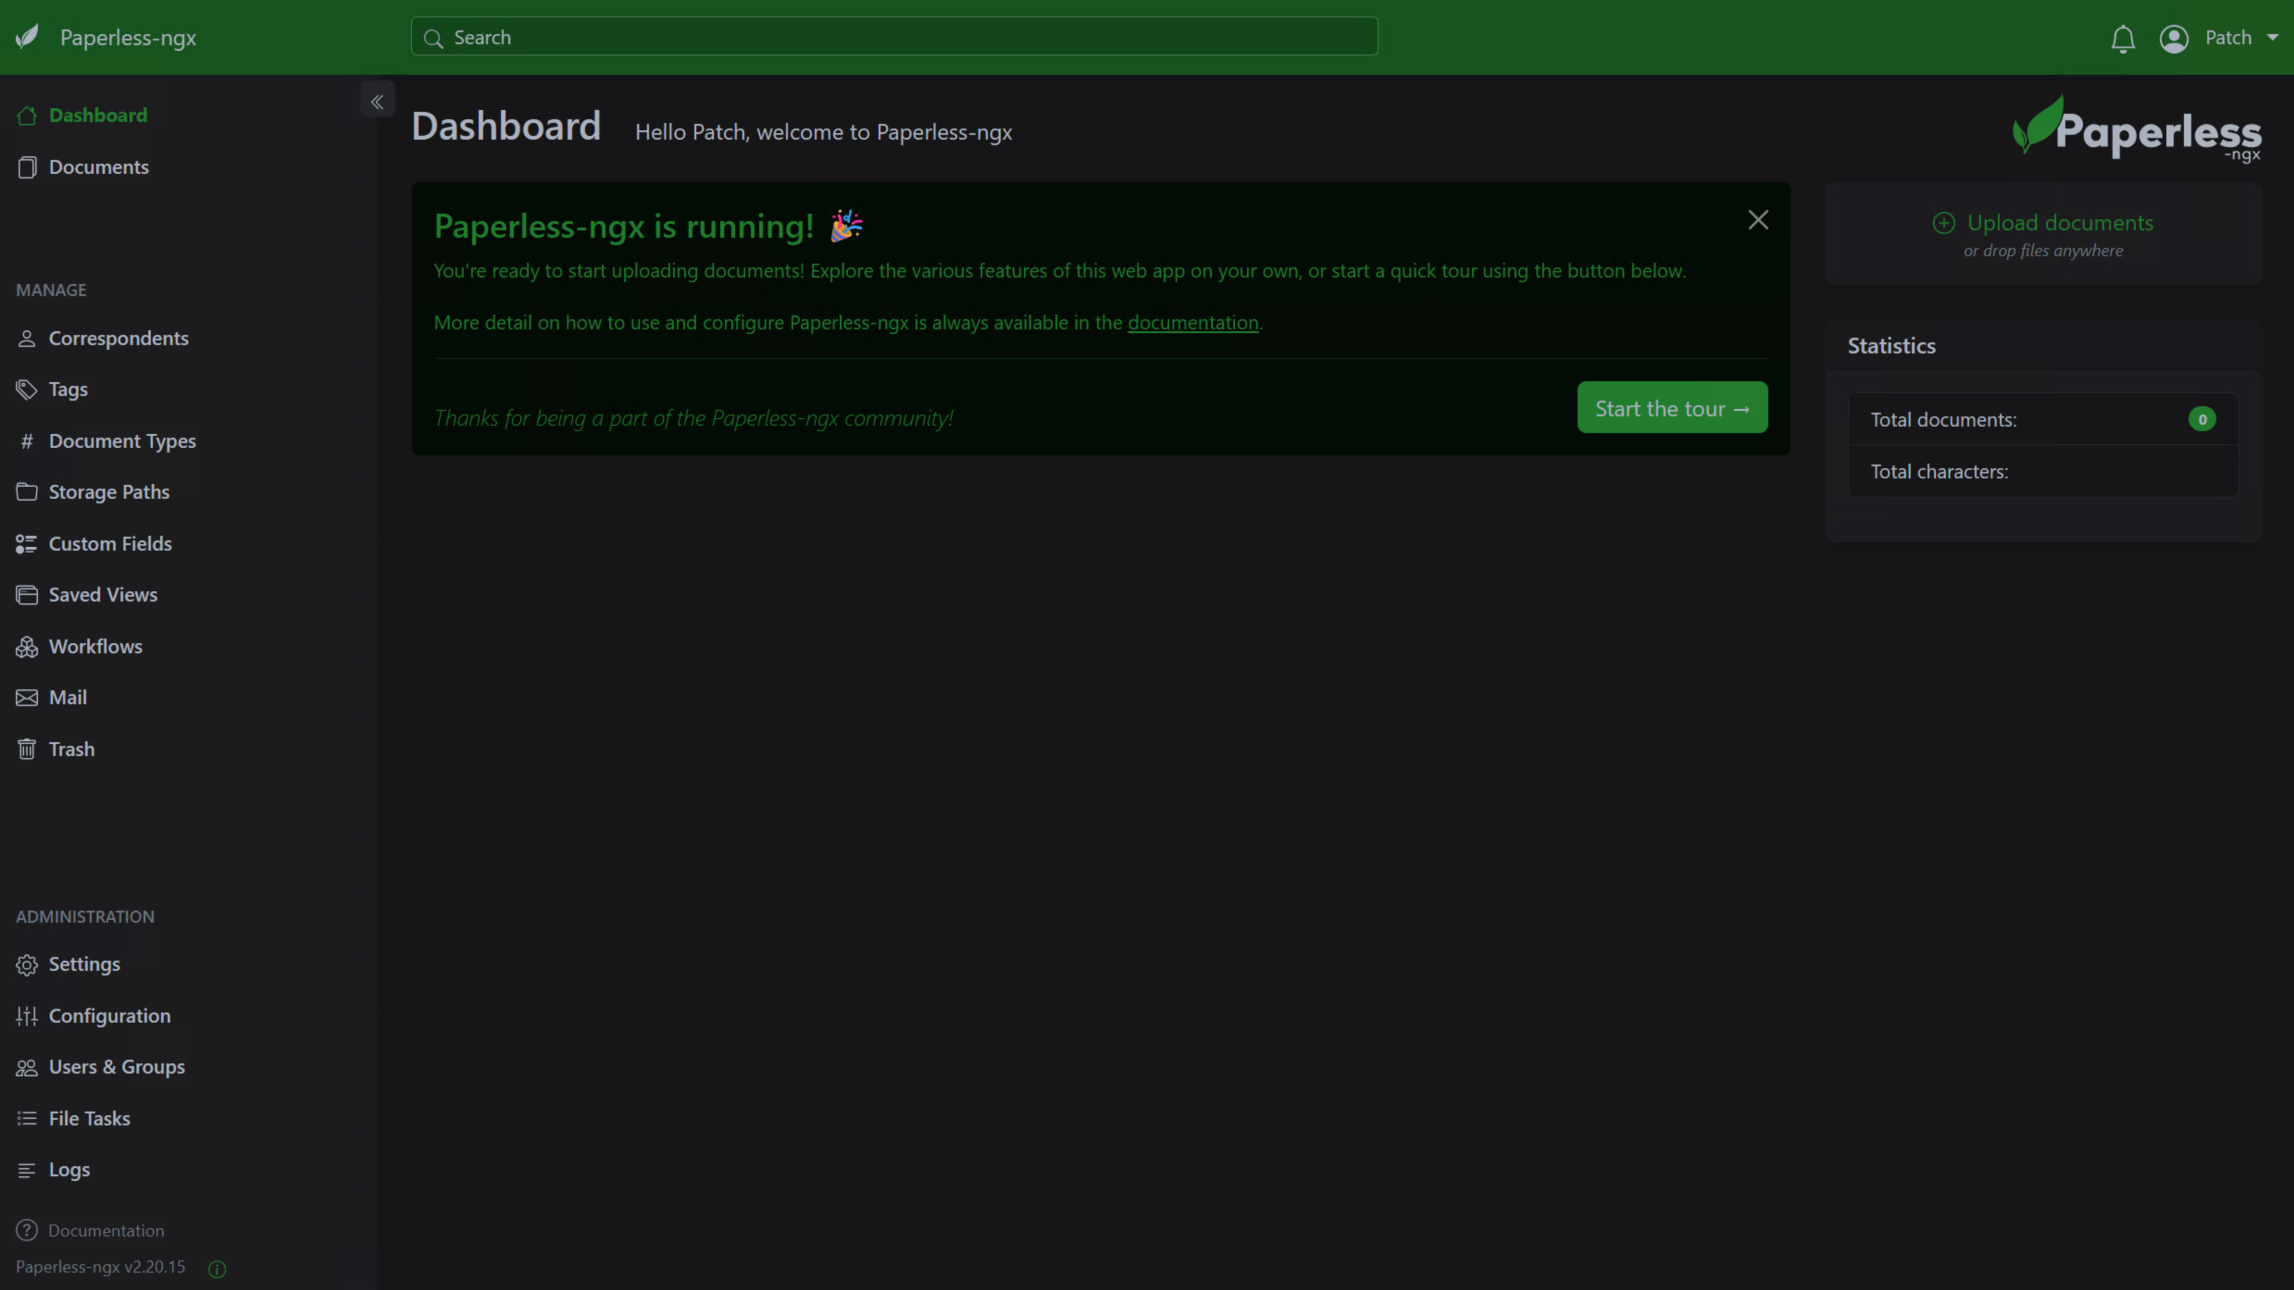
At this point, the install is working.
A few quick things to notice:
the document library will be empty at first
the inbox and saved views live in the sidebar
later, files added to the
consumefolder can be imported automaticallyOCR and metadata extraction happen in the background after ingestion
Optional: Add a domain name and HTTPS
Paperless-ngx should not stay on plain HTTP forever if you plan to use it across the public internet.
For a beginner-friendly next step, put it behind one of these:
Once you have a real domain, update PAPERLESS_URL in docker-compose.env so it matches the final public address.
How to add documents later
One easy workflow is to drop files into the consume folder inside your Paperless-ngx directory. That folder is mapped into the container as the app's consumption directory.
To see it on the host:
pwd
If you followed this guide exactly, your import folder is:
/opt/paperless-ngx/consume
You can upload files through the web UI too, but the consume folder is great for scanners, sync jobs, or later automation.
Common problems and quick fixes
The web page does not open
First, verify the containers are still up.
docker compose ps
If the stack is running, check whether your firewall allows the port you chose.
sudo ufw status
If you are exposing port 8000 directly for testing, make sure your VPS provider firewall is not blocking it either.
The webserver container keeps restarting
Look at the logs.
docker compose logs --tail=100 webserver
Common causes include:
a typo in
docker-compose.envan already-used port on the host
permission problems around mounted folders
a database container that did not start cleanly
File permissions seem wrong in consume or export
Double-check the IDs you used.
id -u
id -g
Then compare them with the USERMAP_UID and USERMAP_GID values in docker-compose.env.
OCR language is wrong for your documents
Edit the environment file.
nano docker-compose.env
Change the OCR language setting, then restart the stack.
docker compose up -d
If you need multiple OCR languages, the upstream configuration docs support that too.
How to update Paperless-ngx
Pull the latest images.
docker compose pull
Recreate the containers with the new image.
docker compose up -d
That is the usual safe update path for this Compose-based install.
How to back it up
For a useful Paperless-ngx backup, think about two kinds of data:
the document library and app data stored in Docker volumes
the files you keep in your local
consumeandexportfolders
A simple beginner-friendly routine is:
back up
/opt/paperless-ngx/consumeback up
/opt/paperless-ngx/exportback up your Docker volumes on a regular schedule
If you are not already backing up Docker volumes on this server, fix that before you trust Paperless-ngx with your only copy of important documents.
How to remove it
Stop and remove the containers.
docker compose down
If you also want to remove the named volumes created by Docker, do that explicitly.
docker compose down -v
Be careful with -v. That removes the Paperless-ngx database and stored document data, which is exactly the kind of excitement most people are not looking for.
You’re done
You now have Paperless-ngx running with Docker Compose on your Linux server, using the official PostgreSQL-based template and persistent storage. From here, the smartest next steps are to add HTTPS, test document ingestion, and make sure backups exist before you feed it anything you would be sad to lose.